How to Connect Brother Printer to MacBook: Top 3 Methods
You are here to learn how to connect Brother printer to MacBook, right? Well, you’ll definitely get a relevant answer to this question. I’ve been dealing with printers for the last seven years, and now I teach users like you to set up their printers to a device like a MacBook.

As there are many ways to connect your Brother printer to a
computer, you can pick what works best for you. You can choose from a wired and
wireless connection. Although all the methods work really well for the
connection process of a Brother printer, you still have the choice to select
your favorite method.
Method
1: Using CD-ROM
After unboxing your Brother printer, you can use its CD-ROM to set up a connection. You’ll receive a CD with your printer. Once you set up your printer using this CD, you can easily set up your printer on a MacBook. Check the steps below.
- In the first step, turn on
your printer by connecting it to a power cable and the power socket.
- After that, get a CD and
put it into an SD drive.
- Continue with the
on-screen directions on the screen. All the steps will help you easily
install printer drivers on a Mac.
- Then, choose your printer
model and set up the paper port.
- Now, move on to the Apple menu and head to the System Preferences.

- Moving forward, click on
the Printers & Scanners and
click on the Add option.


- Thereafter, choose your
printer’s name and click on the Add
option.
- Finally, your Brother printing device is connected to your MacBook.
That’s how to connect
Brother printer to MacBook via a CD-ROM. Let’s move on to the other method.
Method 2: Through a Wi-Fi Network
If you want a wireless connection, this method is especially useful for you. In this method, you’ll connect your printer to a Wi-Fi network. Let’s check the steps to learn how to connect Brother printer to Mac wirelessly.
- To start, enable your
printer and hit the Settings
option on the Control Panel.

- Then, head to the Network option with the help of a
down arrow.
- Now, scroll down to the Wi-Fi option and press the OK option.
- After that, head to the Setup Wizard option.
- In the following step,
choose the Wi-Fi Network
option.
- Also, allow your system to
search for the available networks.
- And then select a Wi-Fi
network to connect to.
- Hit the OK button and supply your
password.
- When you see the Wi-Fi icon on your printer, it will confirm that the connection has been set up.
Finally, your Brother printer is set up on a device using
Wi-Fi. That’s how you can connect both of your devices together.
Method
3: With a USB Cable
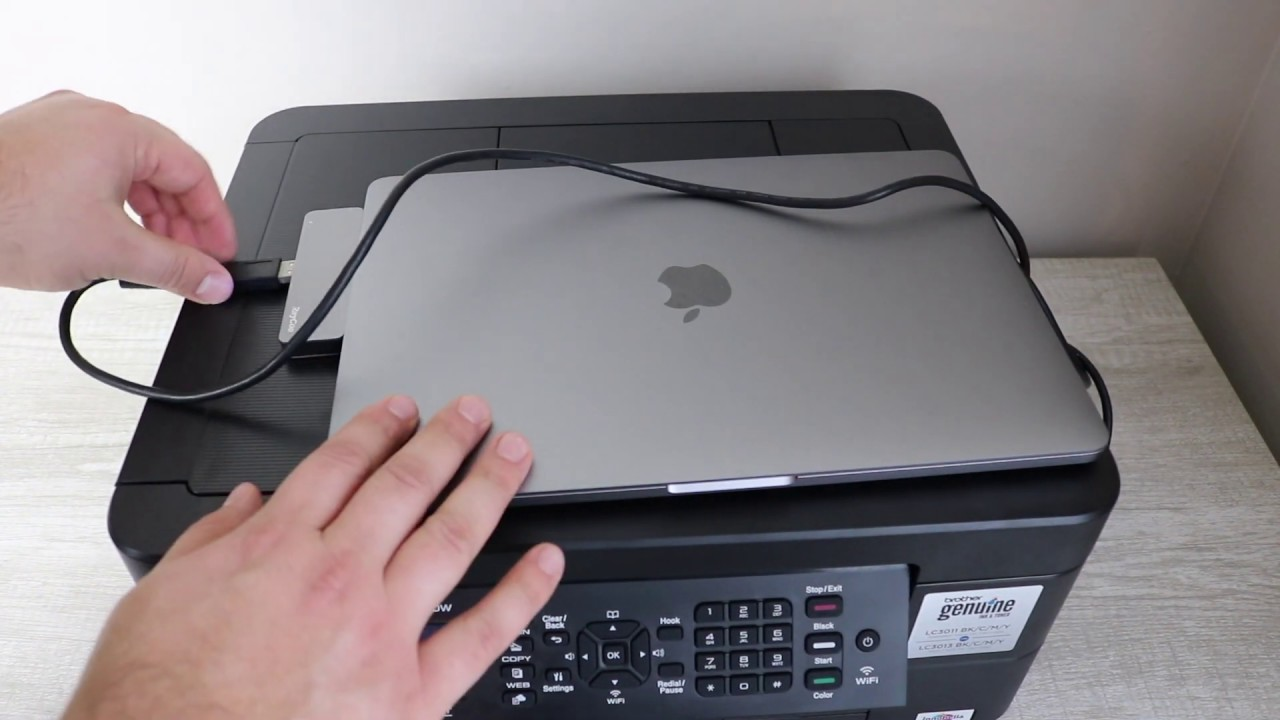
Sometimes, wired connections seem simple and convenient. This is because it doesn’t require any complex steps to get started. In order to set up your devices smoothly, you can choose a USB connection. Most often, printers come with a USB cable, so you don’t have to arrange it by yourself. You can simply go get your USB cable and start the process. Look at the steps below to learn how to connect Brother printer to Mac with cable.
- To get started, get a USB
cable and connect it to one end of your printer’s USB port.
- After that, connect the
other end to your MacBook
- Now, a physical connection
will develop between both of your devices.
- Then, your Mac computer
will recognize your new printer.
- Next, you’ll have to
install the Brother printer drivers.
- Lastly, you’ll have to continue with the on-screen directions.
That’s how you can connect your Brother printing device to a
MacBook in some simple steps.
Conclusion
Summing up, we have seen the top 3 ways to connect a Brother
printer to a MacBook. All these methods, including a USB cable, Wi-Fi, and
CD-ROM, work well for your printer and help you get a better printing
experience. All you have to do is update printer drivers correctly so that you
don’t miss anything before printing. When you know how to connect Brother printer to MacBook, start printing with your
device and get a better experience.
FAQs
Why
Is My MacBook Not Finding My Brother Printer?
If you detect that your MacBook is unable to find your
Brother printer, you should try to check your network to confirm that your
printer and computer are connected over the same Wi-Fi network. Alternatively,
you can try to switch on and off your printer. From these two methods, you’ll
be able to resolve your printer issues easily.
How
to Add My Brother Printer to a MacBook?
To connect your Brother printing device to a MacBook, use these steps:
- To start, head to the Printers and Scanners option.
- Then, click on the “+” option to get the printer
list.
- After that, choose your
printer model from the list.
- Now, choose the CUPS
driver from the Print Using
list.
- Next, click on the Add option.
- Hit the Apple menu icon and click on the
Quit System Preferences option.
How
Do I Connect My Brother Printer to a Computer?
To connect a Brother printer to a computer, you can choose from many different options, such as USB, Bluetooth, Wi-Fi, CD-ROM, and even printer drivers. No matter which connection you choose, you always need to install the updated printer drivers. Thus, whenever you’re connecting your printer to a computer, make sure that your computer has the right set of drivers.
Read more: support.brother.com/windows
brother printer wireless setup

Comments
Post a Comment